


A door flung just a little too hard can create a doorknob-size hole on the drywall. Not only is it an eyesore, it can leave plumbing and electrical systems exposed to the open, posing a hazard to you and your family. However, with minimal equipment, you can patch holes and cracks in drywall. Here are a few steps you can use to fix surface defects on your walls.
Cut Out the Patch
Get a piece of drywall with the same thickness as the damaged drywall, and cut out a square shaped patch big enough to cover up the hole. Place the patch on the damaged section of the wall and draw its outline. Mark the wall above the hole so you can know how to orient the patch.
Prep the Hole
Using a drywall saw, cut along the edges of the outline. Trim away the frayed edges using a utility knife and snap back the drywall pieces inside the outline. Sand the edges with fine-grade sand paper to make the edges smooth.
Add Strapping
Find a 1x3 piece of wood and cut it six inches longer than the height of the hole. Add a bead of construction glue on one face of the strapping and carefully insert it into the hole with the glue facing out. Draw the glued-strapping tightly against the drywall and drive two screws in a spread out pattern through the drywall and into the wood. Take care not to drive the screws too deep not to damage the drywall.
Insert the Patch
Align the patch insert it into the hole. Press the patch firmly against the glue to ensure maximum adhesion. Drive two screws through the patch in a staggered manner and into the strapping.
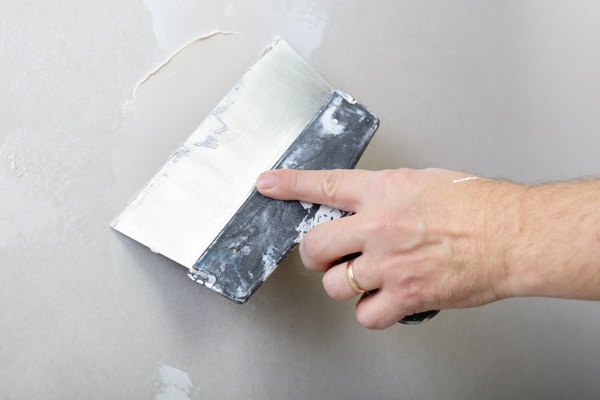
Cover the Seams
Using taping knife (6-inch), trowel a thin layer of joint compound (often called mud) over the patch and screws. The aim is to fashion a smooth transition between the patch and the surrounding wall.
Apply Final Coat
After the compound is dry, apply another thin layer using a 12-inch taping knife and smooth it to at least 6-inches above the margin of the previous coat. Upon drying, sand it with fine silicon carbide sand paper. The wall will then be ready to paint.
Check back for additional home maintenance tips, or visit Home Maintenance: Water Heater or Home Maintenance: 3 Non-toxic Solutions to Ant Invasions.